profilin-actin binding interface from David Oppenheimer on Vimeo.
In my cell biology course, we spend significant time on protein-protein interactions because they are so important for practically everything in cells. To show the interacting surface between two proteins I like to create a quick movie using PyMol. When combined with the interface residues script, the movie highlights the interacting surface nicely. Hereâs how to do it.
Get a protein complex to play with
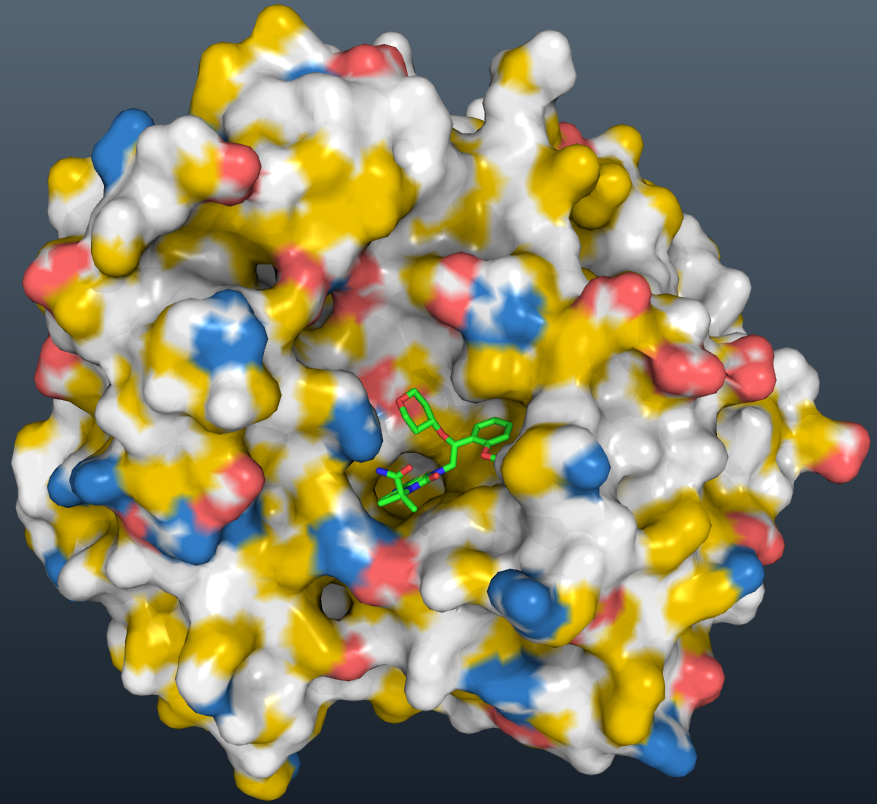
Since I am obsessed with actin and actin-binding proteins, I will use the complex of actin with profilin for this demonstration. Profilin acts as an ATP exchange factor for G-actin. âOldâ actin monomers from recently depolymerized actin filaments have ADP bound to them, and upon binding to profilin, will exchange the ADP for ATP. I found a nice structure (determined by X-ray diffraction) of actin bound to profilin on the RSCB Protein Data Bank website. Open PyMol and type the following into the Pymol command line:
viewport 640, 640 # these settings are for Instagram
fetch 1HLU, async=0
Identify the residues involved in the interaction
Extract the various part of the complex that we want to work with.
extract actin, /1hlu/A
extract profilin, /1hlu/B/P
extract ATP, /1HLU/D/A/ATP
extract Ca, /1HLU/C/A/CA
delete 1hlu
Get the interface residues script and identify the interacting residues
Go to the InterfaceResidues script website and scroll down the page until you reach the box The Code. Copy the code and paste it into a new text file that you name InterfaceResidues.py. Be sure to use a plain text editor and save the files as plain text so that no hidden or extraneous characters are included in the file. My favorite free text editor is TextWrangler. Even though you are saving the file as plain text, make sure that the file extension is .py and not .txt. Save the script to your PyMOL working directory.
from pymol import stored

def interfaceResidues(cmpx, cA='c. A', cB='c. B', cutoff=1.0, selName="interface"):
	"""
	interfaceResidues -- finds 'interface' residues between two chains in a complex.

	PARAMS
		cmpx
			The complex containing cA and cB

		cA
			The first chain in which we search for residues at an interface
			with cB

		cB
			The second chain in which we search for residues at an interface
			with cA

		cutoff
			The difference in area OVER which residues are considered
			interface residues.  Residues whose dASA from the complex to
			a single chain is greater than this cutoff are kept.  Zero
			keeps all residues.

		selName
			The name of the selection to return.

	RETURNS
		* A selection of interface residues is created and named
			depending on what you passed into selName
		* An array of values is returned where each value is:
			( modelName, residueNumber, dASA )

	NOTES
		If you have two chains that are not from the same PDB that you want
		to complex together, use the create command like:
			create myComplex, pdb1WithChainA or pdb2withChainX
		then pass myComplex to this script like:
			interfaceResidues myComlpex, c. A, c. X

		This script calculates the area of the complex as a whole.  Then,
		it separates the two chains that you pass in through the arguments
		cA and cB, alone.  Once it has this, it calculates the difference
		and any residues ABOVE the cutoff are called interface residues.

	AUTHOR:
		Jason Vertrees, 2009.
	"""
	# Save user's settings, before setting dot_solvent
	oldDS = cmd.get("dot_solvent")
	cmd.set("dot_solvent", 1)

	# set some string names for temporary objects/selections
	tempC, selName1 = "tempComplex", selName+"1"
	chA, chB = "chA", "chB"

	# operate on a new object & turn off the original
	cmd.create(tempC, cmpx)
	cmd.disable(cmpx)

	# remove cruft and inrrelevant chains
	cmd.remove(tempC + " and not (polymer and (%s or %s))" % (cA, cB))

	# get the area of the complete complex
	cmd.get_area(tempC, load_b=1)
	# copy the areas from the loaded b to the q, field.
	cmd.alter(tempC, 'q=b')

	# extract the two chains and calc. the new area
	# note: the q fields are copied to the new objects
	# chA and chB
	cmd.extract(chA, tempC + " and (" + cA + ")")
	cmd.extract(chB, tempC + " and (" + cB + ")")
	cmd.get_area(chA, load_b=1)
	cmd.get_area(chB, load_b=1)

	# update the chain-only objects w/the difference
	cmd.alter( "%s or %s" % (chA,chB), "b=b-q" )

	# The calculations are done.  Now, all we need to
	# do is to determine which residues are over the cutoff
	# and save them.
	stored.r, rVal, seen = [], [], []
	cmd.iterate('%s or %s' % (chA, chB), 'stored.r.append((model,resi,b))')

	cmd.enable(cmpx)
	cmd.select(selName1, None)
	for (model,resi,diff) in stored.r:
		key=resi+"-"+model
		if abs(diff)>=float(cutoff):
			if key in seen: continue
			else: seen.append(key)
			rVal.append( (model,resi,diff) )
			# expand the selection here; I chose to iterate over stored.r instead of
			# creating one large selection b/c if there are too many residues PyMOL
			# might crash on a very large selection.  This is pretty much guaranteed
			# not to kill PyMOL; but, it might take a little longer to run.
			cmd.select( selName1, selName1 + " or (%s and i. %s)" % (model,resi))

	# this is how you transfer a selection to another object.
	cmd.select(selName, cmpx + " in " + selName1)
	# clean up after ourselves
	cmd.delete(selName1)
	cmd.delete(chA)
	cmd.delete(chB)
	cmd.delete(tempC)
	# show the selection
	cmd.enable(selName)

	# reset users settings
	cmd.set("dot_solvent", oldDS)

	return rVal

cmd.extend("interfaceResidues", interfaceResidues)
The InterfaceResidues script relies on the interacting proteins have chains labeled A and B. Check that the complex has the correct chain labels.
get_chains 1hlu
# cmd.get_chains:  ['A', 'P']
Because the chains are not named A and B, I have to create a complex with the 2 chains to use the InterfaceResidues script. Run the script, create the complex, and identify the interacting residues.
run InterfaceResidues.py
create profilin-actin, chain A or chain P
interfaceResidues profilin-actin, c. A, c. P
The script will create a selection named (interface) that contains the interface residues.
Color the proteins to highlight the interacting surfaces
Next we want to color the protein so that the interacting surfaces are highlighted. PyMOL has many different ways to display proteins and residues, so you can let your artistic juices flow! Here I will use a surface representation and color the interacting residues using the YRB highlighting script developed by Hagemans et al.1.
Create some objects to color.
Here we will create the interface residues objects for actin and profilin.
create int-actin, (interface) in actin
create int-profilin, (interface) in profilin
To get the YRB script to color just the residues in the interaction surface, you need to identify all the residues by name so you can exclude them from the object that you will color grey. Turn off all the objects except int-actin. Then select each of the residues using the mouse. Copy the residue path from the command line window. Change int-actin in the path to actin when you select the residues to color grey, or use residue number (resi 1+2+3).
To quickly make the list of residues in the interaction, do the following:
- In the pymol viewer, turn off everything but
int-profilin. - In the pymol command line window, type
orient int-profilin. - In the pymol viewer, click each residue to select it. Each selection will be recorded in the pymol command line window.
- When you are done selecting all residues, copy all the data from the command line window and paste it into TextWrangler.
- Use TextWranglerâs powerful search and replace feature to quickly remove the unneeded text from your list of residues.
- Repeat with int-actin.
- Duplicate each list and use the search and replace feature (selected text only) to make the list of residues to select (resi 1+2+3).
When this is done, we can create selections of the residues that are not in the interface so we can color them separately later.
select not-int-actin, actin and (not resi 351+354+355+167+166+169+170+171+172+173+375+374+373+372+371+133+113+369+368+365+361+283+284+285+286+290+287+289+288)
select not-int-profilin, profilin and (not resi 15+118+117+119+120+121+122+99+97+88+89+90+69+71+72+73+86+74+84+124+125+129+128+82+81+58+59+60+61+62)
deselect
Orient the protein
disable all
enable profilin-actin
show lines, profilin-actin
orient profilin-actin
set_view (\
     0.413371980,    0.062172260,    0.908435643,\
     0.838299513,   -0.415481538,   -0.353022039,\
     0.355487406,    0.907469451,   -0.223868802,\
    -0.000582412,   -0.000603586, -291.505859375,\
    12.634649277,   33.541786194,   69.472816467,\
   216.508850098,  366.507873535,  -20.000000000 )
disable all
enable actin
enable profilin
Color the protein complex using the YRB script
Download the YRB script from this link to the publication. Scroll to the Supplementary Information section and download (and unzip) the YRBscript.zip file. Rename the file to YRBscript.pym and place it in your pymol working directory. Run the script from within pymol.
run ~/pymol-work/1-scripts/YRBscript.pym
Color the protein.
show surface, actin
show surface, profilin
yrb
Note: the yrb command hides hydrogens. This is probably okay as they somewhat obscure the yrb coloring.
#A script to highlight hydrophobicity and charge on protein surfaces
#DHS065 Hagemans et al YRB script
#created by Dominique Hagemans and Ianthe A.E.M. van Belzen, July 2015
#Rudiger group CPC, Utrecht University

#yellow: C, CH, CH2, CH3 groups that are not bound to N or O groups.
#red: negatively charged atoms
#blue: positively charged atoms
#grey: backbone, polar groups and remaining atoms

#usage:
#(1) save this script as file with a .py extension at desirable location
#(2) open your structure in pymol and change to surface view.
#(3) run this script: File --> Run --> DHS065 Hagemans et al YRB script
#(4) give the command to colour all structures or a specific structure:
#(4 a) "yrb" to colour all structures
#(4 b) "yrb 'designation'" to colour only that specific structure

from pymol import cmd

def yrb(selection='all'):

	cmd.remove("hydro")
	cmd.set_color('yellow',[0.950,0.78,0.0])
	cmd.set_color('grey',[0.95,0.95,0.95])
	cmd.set_color('red',[1.0,0.4,0.4])
	cmd.set_color('blue',[0.2,0.5,0.8])

	mapping = {}
	mapping['arg'] = [ ('NE,NH2,NH1', 'blue'), ('CD,CZ', 'grey'), ('CG', 'yellow') ]
	mapping['asn'] = [ ('CG,OD1,ND2', 'grey') ]
	mapping['asp'] = [ ('CG', 'grey'), ('OD2,OD1', 'red')  ]
	mapping['cys'] = [ ('SG', 'grey') ]
	mapping['gln'] = [ ('CG', 'yellow'), ('CD,OE1,NE2', 'grey') ]
	mapping['glu'] = [ ('CG', 'yellow'), ('CD', 'grey'), ('OE1,OE2', 'red') ]
	mapping['his'] = [ ('CG,CD2,ND1,NE2,CE1', 'grey') ]
	mapping['ile'] = [ ('CG1,CG2,CD1', 'yellow') ]
	mapping['leu'] = [ ('CG,CD1,CD2', 'yellow') ]
	mapping['lys'] = [ ('CG,CD', 'yellow'), ('CE', 'grey'), ('NZ', 'blue') ]
	mapping['met'] = [ ('CG,CE', 'yellow'), ('SD', 'grey') ]
	mapping['phe'] = [ ('CG,CD1,CE1,CZ,CE2,CD2', 'yellow') ]
	mapping['pro'] = [ ('CG', 'yellow'), ('CD', 'grey') ]
	mapping['ser'] = [ ('CB,OG', 'grey') ]
	mapping['thr'] = [ ('CB,OG1', 'grey'), ('CG2', 'yellow') ]
	mapping['trp'] = [ ('CG,CD2,CZ2,CH2,CZ3,CE3', 'yellow'), ('CD1,NE1,CE2', 'grey') ]
	mapping['tyr'] = [ ('CG,CE1,CD1,CE2,CD2', 'yellow'), ('CZ,OH', 'grey') ]
	mapping['val'] = [ ('CG1,CG2', 'yellow') ]

	obj_list = cmd.get_names('objects')
	for obj in obj_list:
		if (obj == selection or selection == 'all'):
			cmd.color('grey','(n. N,C,CA,O and ' + obj + ')')
			cmd.color('yellow','(n. CB and ' + obj + ')')

			for key in mapping:
				for (atom, color) in mapping[key]:
					cmd.color(color, '( n. ' + atom + ' and r. ' + key + ' and ' + obj + ' )')

cmd.extend('yrb',yrb)
Set some new colors and color the residues not in the interaction interface
set_color pastelbeigeC= [0.906,0.824,0.573]
set_color pastelbeigeN= [1,0.937,0.745]
set_color pastelbeigeO= [0.808,0.71,0.408]
set_color pastelbeigeS= [0.698,0.584,0.247]
set_color pastellightgreenC= [0.753,0.851,0.537]
set_color pastellightgreenH= [0.91,0.957,0.808]
set_color pastellightgreenN= [0.863,0.937,0.698]
set_color pastellightgreenO= [0.643,0.757,0.38]
set_color pastellightgreenS= [0.525,0.655,0.231]
color pastelbeigeC, elem C and (not-int-actin)
color pastelbeigeN, elem N and (not-int-actin)
color pastelbeigeO, elem O and (not-int-actin)
color pastelbeigeS, elem S and (not-int-actin)
color pastellightgreenC, elem C and (not-int-profilin)
color pastellightgreenN, elem N and (not-int-profilin)
color pastellightgreenO, elem O and (not-int-profilin)
color pastellightgreenS, elem S and (not-int-profilin)
At this point, it is a good idea to save the PyMOL session. It is really easy to just load the .pse session file if we mess something up later on rather than re-creating the entire process.
Set up PyMOL and make a movie
set matrix_mode, 1
set movie_panel, 1
set scene_buttons, 1
set cache_frames, 0
config_mouse three_button_motions, 1
Here is the script I use to make a movie with a simple rotation of each protein to show the interaction interface. You can either save these commands as a script file and then run the script from within PyMOL, or you can just cut these commands and paste them into the PyMOL command line. I built this script using information from the PyMOLwiki
python
for x in range(1):
  cmd.madd("1 x60"); cmd.frame(1000);
  cmd.rotate("y", -70, object="actin")
  cmd.translate([-15,0,0], object="actin")
  cmd.rotate("y", 90, object="profilin")
  cmd.translate([35,0,15], object="profilin")
  cmd.mview("store", object="actin")
  cmd.mview("store", object="profilin")
  cmd.mview("store")
  cmd.mview("interpolate", object="actin")
  cmd.mview("interpolate", object="profilin")
  cmd.mview("reinterpolate")


# wait 0.5 second

  cmd.madd("1 x15"); cmd.frame(1000);
  cmd.mview("store", object="actin")
  cmd.mview("store", object="profilin")
  cmd.mview("store")
  cmd.mview("interpolate", object="actin")
  cmd.mview("interpolate", object="profilin")
  cmd.mview("reinterpolate")


  cmd.madd("1 x60"); cmd.frame(1000);
  cmd.translate([15,0,0], object="actin")
  cmd.rotate("y", 70, object="actin")
  cmd.translate([-35,0,-15], object="profilin")
  cmd.rotate("y", -90, object="profilin")
  cmd.mview("store", object="actin")
  cmd.mview("store", object="profilin")
  cmd.mview("store")
  cmd.mview("interpolate", object="actin")
  cmd.mview("interpolate", object="profilin")
  cmd.mview("reinterpolate")

  # wait 0.5 second

  cmd.madd("1 x15"); cmd.frame(1000);
  cmd.mview("store", object="actin")
  cmd.mview("store", object="profilin")
  cmd.mview("store")
  cmd.mview("interpolate", object="actin")
  cmd.mview("interpolate", object="profilin")
  cmd.mview("reinterpolate")
python end
Make everything look pretty and write the movie to a series of png files
set antialias, 1
set depth_cue, 0
set ambient,0.1
set specular, 0.3
set shininess, 100
set spec_count,1
set light_count,8
set direct,0.75
set ray_shadow_decay_factor, 0.1
set ray_shadow_decay_range, 2
set ambient_occlusion_mode, 1
set ambient_occlusion_scale, 15
set bg_gradient
set bg_rgb_top, [0.337,0.3961,0.451]
set bg_rgb_bottom, [0.09, 0.1255, 0.1647]

set hash_max, 220
set ray_trace_mode, 0
set depth_cue=0
set ray_trace_fog=0
set ray_trace_frames=1
set cache_frames=0
Move from the working directory to a new directory where you can store all the png files, and write the png files for the movie.
cd ../1-movies/actin-profilin-pngs
mpng actin-profilin
I have previously installed the free command line video tool, FFMPEG. There is definitely a learning curve when using ffmpeg, but luckily, there are lots of tutorials on the web for your learning enjoyment. Here are the options I used to make the movie. I got the explanations from the Joy of Data blog and the ffmpeg manual.
ffmpeg
  -framerate 30     # input frame rate
  -i image%03d.png  # image names (image000.png, ..., image999.png)
  -s:v 720x720      # video size
  -c:v libx264      # encoder
  -profile:v main   # H.264 profile for video
  -crf 12           # constant rate factor (0 to 23, 0 is lossless)
  -pix_fmt yuv420p  # pixel format; changes the rgb from the pngs to yuv
  -preset veryslow  # encoding speed (slow but higher quality per file size)
  -tune stillimage  # tunes the encoding settings for images
  -r 30             # output frame rate
  output_file.mp4   # movie file name
Open a terminal window, move into the .png file directory and type the following:
ffmpeg -framerate 30 -pattern_type glob -i '*.png' -s:v 640x640 -c:v libx264 -profile:v main -crf 12 -tune stillimage -pix_fmt yuv420p -preset veryslow -r 30 actin-profilin.mp4
For Vimeo, use the following:
ffmpeg -framerate 30 -pattern_type glob -i '*.png' -s:v 720x720 -c:v libx264 -crf 18 -tune stillimage -pix_fmt yuv420p -preset veryslow -r 30 actin-profilin-vim.mp4